 |
 Kim Montenero is a freelance writer and craft designer. Her work has been featured in many publications including Reloved Magazine, Parade.com and The Huffington Post. She blogs at www.exquisitelyunremarkable.com where she encourages individuals to feather their nests with super easy and elegant DIY and craft projects regardless of their skill level. She can be contacted through her website. |
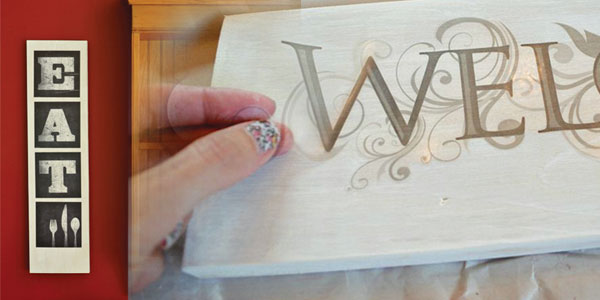
| Are you ready for the easiest project ever? Well, today, I have another quick and inexpensive craft to share that will make you look like a DIY rockstar. I'm going to show you how to make a spectacular custom wooden sign in less than 30 minutes and for less than ten bucks. Whether you are an expert at handmade signage looking for the occasional shortcut or a total beginner, intimidated by the prospect of lettering, I've got the answer for you. The idea dawned on me several years ago, while I was browsing through the craft store. I came upon a pretty wall decal sticker and right away, I thought that it would make a great sign. It was only $1.99, less if you count my coupon, I had a board and some paint at home, so I figured it was worth the gamble. I am so glad that I took the chance. What I love about the wall decals is that they're easy to use. If you mess up, you can just peel them off and reapply, and they are super cheap! The dollar store has a great selection, for a dollar, and the craft stores carry them, too. They come in patterns appropriate for any room and for each holiday and season. Plus, when I am done with the sign, if I get bored, I can either flip it over and decorate the back or peel the sticker off and add a new one. Love that! The directions are almost too simple. I started with a plain pine board, cut to the size I desired. Now, I am not a power tool girl, so I had my hubby cut a leftover piece of pine that we had in the garage for my first project. However, for other signs, I have gone to the hardware store, purchased a board and had them cut it to size for me for free! You can also use reclaimed wood or driftwood. Get creative. At home, I painted the board with two quick coats of craft paint and let it dry for about 5 minutes. Then I peeled the sticker away from its backing and stuck it to the board. I smoothed it down with my hand and voila! Perfectly lettered, pretty, wooden handmade sign. Now, my signs are generally shelf sitters, but if you add a picture hanger to the back, you will have a wall sign. Also, you could seal it with decoupage gel if you wanted to permanently affix the sticker to the board, but I like options, so I do not. I have been making wooden signs using wall art stickers for years and yet, I am always amazed by the results when I am finished. I bet you will be, too. Happy crafting! |
|


 20 lucky winners will win $500 each in prizes totaling $10,000.